
- Introducing the GoSight NG Dashcam
- GoSight Ecosystem
- Prior to install
- Configuration - MyGeotab
- Physical installation - GoSight
Introduction - DashCam
A camera that integrates the artificial intelligence developed by AttriX for vehicles.
For several years, our research and development projects in the field of artificial intelligence have allowed us to integrate unique functionalities into GoSight's solutions for heavy transporters. Intelligent features such as lane drift detection and tail gating can significantly increase the safety of your fleet. In addition, AttriX's intelligent on-board camera is a tool that can help reduce insurance premiums.

GoSight EcoSystem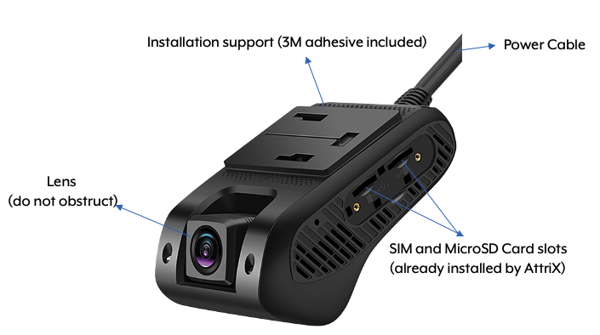
*The memory card should be class 10 and have a recommended capacity of 128GB to ensure sufficient video in memory.
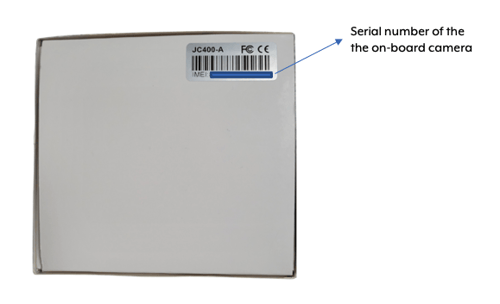
Prior to install
- Have the camera box on hand to record the serial number.
- Identify the camera box with the number of the vehicle in which it will be installed.
- Have access to the MyGeotab portal.
- Have created the appropriate accelerometer rules in MyGeotab***.
Contact the training team to schedule a free 30-minute call to set up your rules: training@attrix.ca.
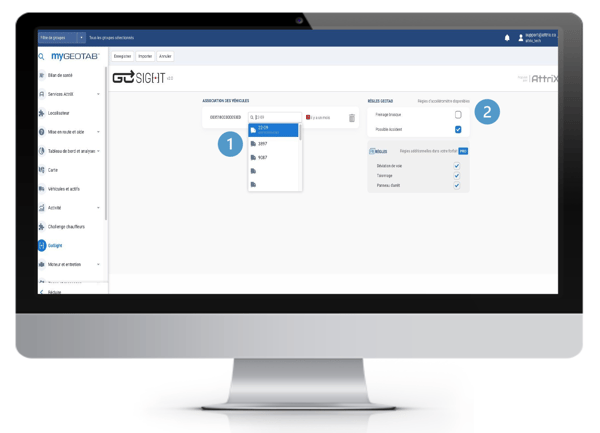
Configuration - MyGeotab
From MyGeotab, on the GoSight tab, click on Configuration.
- Assign the camera to the vehicle
- Select the vehicle to be assigned using the drop-down list.
- Click on Save
- Associate rules
- Select the appropriate rules (*AI rules are available on the Pro plan)
- Click on Save
Physical installation -GoSight
Camera power supply
Step 1
Connect the red wire 10 amp fuse to a constant power source. It is labeled B+ and can replace your current 10 amp B+ fuse.
Test with a voltmeter to make sure the power is constant (any 10 amp constant wattage fuse can be used).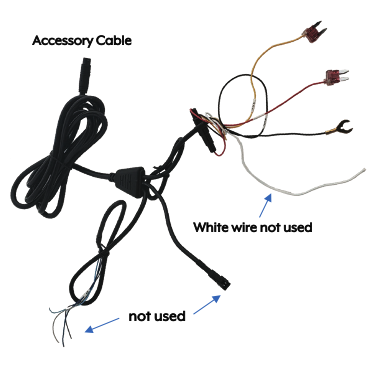
Step 2
Connect the accessory harness ground wire (black) to the DC chassis ground.
Always connect the ground wire to an established ground stud, if possible.
The vehicle chassis is an acceptable ground point if no ground stud is available.
The surface must be clean and free of paint, rust or other foreign matter.
Step 3
Connect the yellow wire, 10 amp fuse, to a switched ignition source. It is labeled ACC and can be replaced with any 10 amp fuse with ignition power.
Test with a voltmeter to make sure there is enough power to the circuit when the ignition is off and enough power to the circuit when the ignition is on.
Step 4
Connect the accessory cable and power bank to the camera.
When routing the cables, it is recommended that you route the power bank cable with the accessory cable to the fuse panel and zipper tie it to the wiring harness or other part behind the cover that will secure the camera.
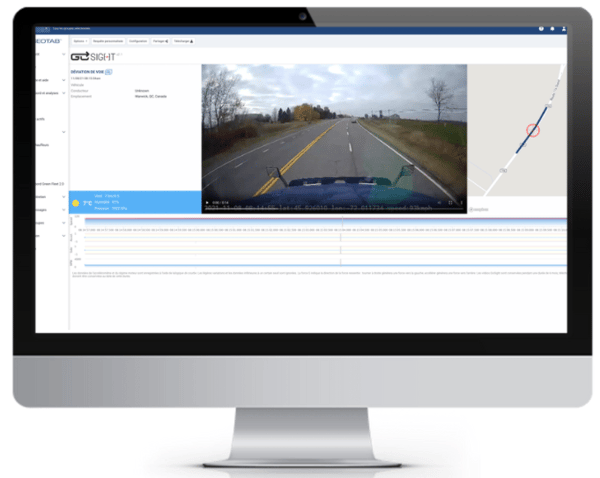
After installation
Once the installation is complete, to validate the position and view of the GoSight camera, click on the camera icon in the "Configuration" tab in MyGeotab. You will have a direct view of the camera to adjust the installation if necessary. Please note that the camera must have power during this operation so the vehicle must be on ignition or accessory.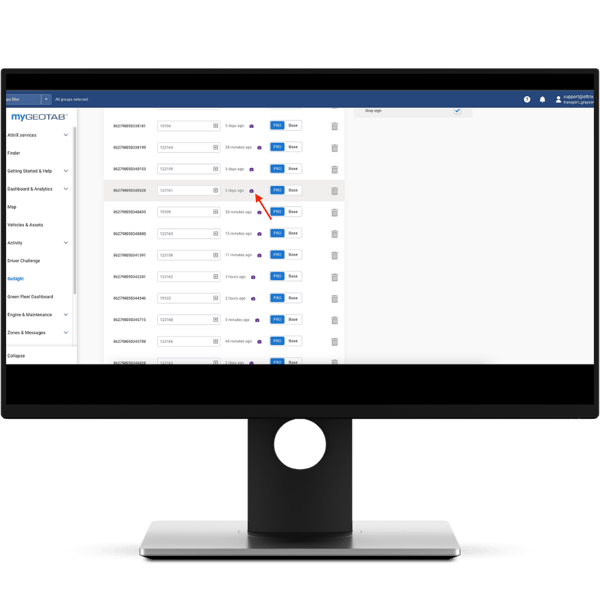
Still not working? Need help?
Contact our technical support:
1-888-299-8555 or email support@attrix.ca