![Logo AttriX Bleu.svg]](https://support.attrix.ca/hubfs/Logos/AttriX/Logo%20AttriX%20Bleu.svg)
Applies to:
- MyGeotab
- Receiving automatic reports
- Automating reports via email
- Scheduling a report via email
From MyGeotab, it's possible to schedule the automatic reception of your reports at various times. During the report setup, you'll be able to select desired time ranges, data to include, and recipients.
Report Configuration
1. From the Reports tab > Report Setup > Report Views
2. Scroll through the list or use the search bar with the model name to find the report for which you want to configure email notifications.
3. Click on the report, then click on the Email Report tab. Then, set the email options to Yes.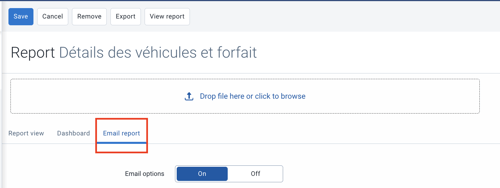
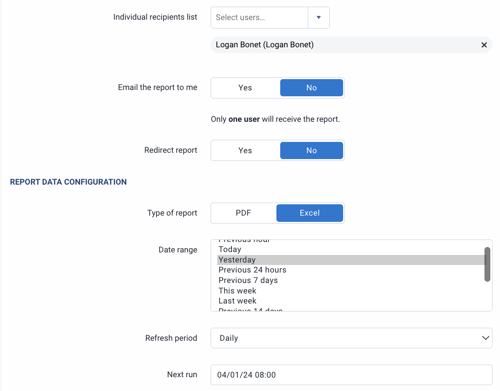
4. Under Display Options, select the recipients.
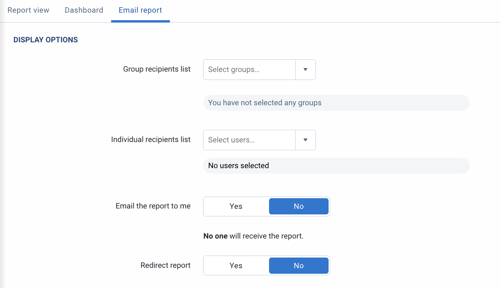
- List of recipient groups: Sends the report to users in the selected group. Be cautious, if you select All: Company Group, all users in your database will receive the report.
- List of individual recipients: Sends the report to selected users.
- Send me the report via email: Toggle to Yes if you want to receive the report.
- Redirect the report: For report redirection, this option can be used to send the report to a user other than yourself based on certain conditions. If you're receiving the report, or if you've selected other recipients, leave this option as No. (See Geotab's English article here)
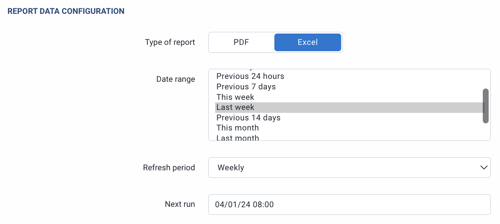
5. Under Report Data Configuration, you can choose the data time frame you want to receive on the report.
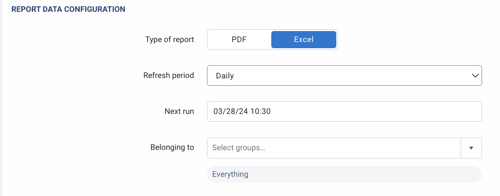
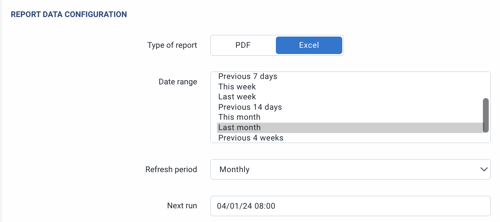
- Report Type: Select PDF or Excel (dark blue indicates selected choice)
- Date Ranges: Configure the date range to be included in the report
- Refresh Period: Select how frequently you want the report to be sent via email
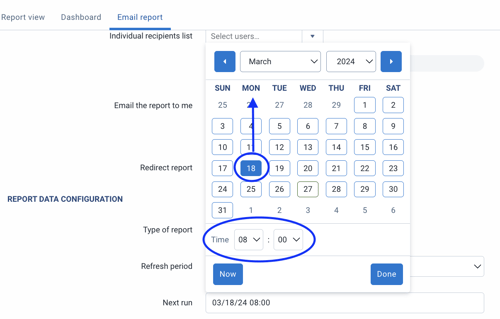
- Next Report Production: The time when the report will be sent via email.
- Belongs to: Select data belonging to a certain group (vehicle or user) if applicable. The default is "All" (data for all groups). For example, you want to receive data from only one of your divisions.
6. Depending on the report, there might be additional report options at the bottom. This may prompt you to enter specific exceptions, zone types, or other options depending on the report type.
7. Once finished, scroll back up and click Save.
Scenario
I want to receive a report every Monday morning at 8 o'clock including data from the past week.
- Date Ranges: Last week
- Refresh Period: Weekly
- Next Report Production: Next Monday at 8 AM
I want to receive a report every month including data from the previous month.
- Date Ranges: Last month
- Refresh Period: Monthly
- Next Report Production: On the day of the month (example April 1st) select the 1st.
I want to send a report to my colleague every day including data from yesterday. I don't want to receive this report.
- List of individual recipients: Select your colleague's email
- Send me the report via email: No
- Date Ranges: Yesterday
- Refresh Period: Daily
- Next Report Production: Tomorrow at 8:00
ADDITIONAL NOTES
If you don't receive a report via email, check your spam or junk mail folder, your deleted emails, and your blocking settings.
Here is an English document from Geotab explaining the various reports integrated into your MyGeotab platform.