![Logo AttriX Bleu.svg]](https://support.attrix.ca/hubfs/Logos/AttriX/Logo%20AttriX%20Bleu.svg)
Regarding:
- Creation or modification of groups
- Configuration / Users / Vehicles / Trailers
Article Topics
- Creating Groups (Group Tree)
- Deleting, moving, or modifying a group
- Assigning to users
- Assigning to vehicles
- Assigning to trailers
- Assigning to inspection lists (RDS)
Creating Groups (Group Tree)
It is possible to create groups within your database. This way, you can quickly filter your information. You can also restrict access to data by granting access only to specific groups for users.
It is important to follow these steps to configure your groups correctly. Improper configuration can result in users losing access.
- Groups & Rules > Groups
- Configuring different divisions (groups)
- Assigning groups to users
- Assigning groups to vehicles
- Assigning groups to trailers
It is also possible to assign groups to inspection lists (RDS) so that users and vehicles only have access to the appropriate list for their vehicle.

It is important that access works from left to right, meaning that those who have access to the Enterprise Group have access to everything to the right. Conversely, a group on the right would not have access to what is in the Enterprise Group. It would also not have access to groups at the same level (above and below).
To add a division, simply press the "+" and enter the name in the "Name" section and then press "Save".
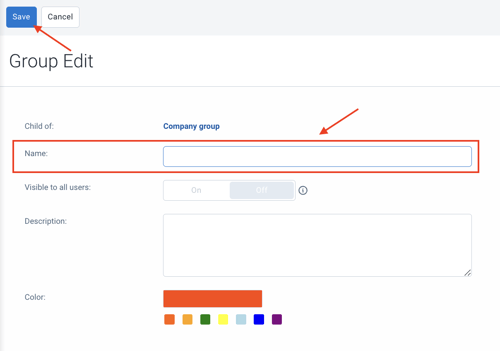
Once saved, the group will appear in the group tree.

It is possible to create groups within a group. For example, within the "Driver Type" group, you could create several divisions.
You could also create an AttriX Compliance group to group assets (vehicles & trailers) as well as users that you want to appear in your "AttriX Compliance" report.

Once your group tree is complete, you can begin assigning your groups to your assets as well as your users.
Delete, modify, or move a group
In case of error, it is possible to delete or modify a group. In both cases, simply click on the group in question.

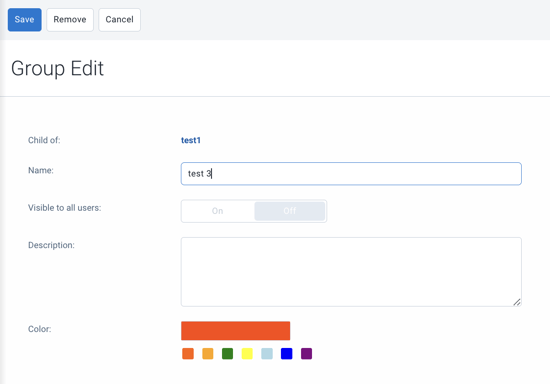
Once the group is selected, you will have access to modify or delete the group.
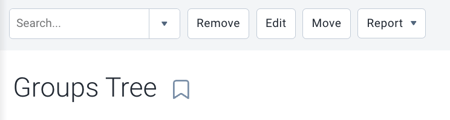
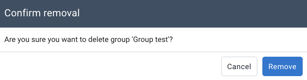
- Delete: the group will be removed from the tree.
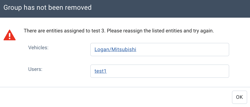
- Note that it will be impossible to delete it if elements are associated with it. You will receive a message indicating which elements are associated with the group you are trying to delete. If you wish to delete it, you must "Confirm" and then remove the group from the displayed element.
- Edit: modify the group name, description, or color.
- Move: You can move this group to another division (Example local, move it from Company 1 to Company 2 or to Driver Type).
- Once you have pressed "Move", select the parent group to which you want to move it and press "Move selection".

- Once you have pressed "Move", select the parent group to which you want to move it and press "Move selection".
Assign the group to users
Once your groups are created, it is important to assign them to users as well as your assets to ensure that users have access to the necessary data. You can also use your group filters to quickly filter what is displayed.
To assign one or more groups to a user, you must go to the People tab> Users & Drivers > Select the user to modify. Select the group(s) in the "Data Access" section. Once the groups are assigned, press "Save".

Assign to vehicles
It is important to assign vehicles to groups. If a driver is assigned to a group, but their vehicles are not, they will not be able to log in to perform electronic logs. The same principle applies to a user of the MyGeotab application. If vehicles are not assigned to groups, the user will not have access to those vehicles.
To assign groups to a vehicle, you must go to the Assets tab> Select the vehicle or asset to modify. Once the modifications are made, press "Save".

Assign to a trailer
Just like vehicles, it is important to assign groups to trailers, otherwise, the driver will not be able to connect to their trailers.
To assign a group to a trailer, you must go to the Assets tab > Filter > Untracked > Select the trailer to modify. Once the modifications are completed, press "Save".

Assign to inspection lists
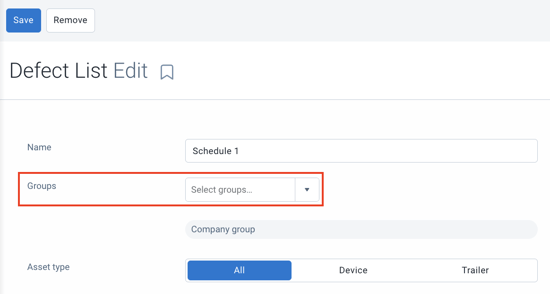
It is possible to assign a group to an inspection list. This way, a vehicle and a user assigned to this group will not have any other options during their electronic inspections than the list that has been assigned.
To assign a group to an inspection list, you must go to the Maintenance tab> Asset Inspections> Defect List> Select the list to modify. Once the modification is completed, press "Save".