![Logo AttriX Bleu.svg]](https://support.attrix.ca/hubfs/Logos/AttriX/Logo%20AttriX%20Bleu.svg)
Watch the Geotab video by clicking on the link below.
https://support.geotab.com/video-hub/video?uuid=cqWHkVuiVz1NgWkg2EHHwL
Zone Import
You can use an Excel file to prepare a list of zones to import into your database. This will save you time when you want to create a large number of zones. The Excel file must be set up in a specific format.
When your zone addresses are available, use the following format to create a spreadsheet in Excel:
| A | B | C | D | E | F |
| 1* Name | Complete address | Reference | Comments | Is the zone shaped like a circle ? | Diameter |
| 2 New zone without coordinates | Canada, Oakville | This is a reference for this zone | Comments | No | 250 |
Excel File Setup
Each row in the Excel table represents a zone. There's no need to add a header in your Excel file. (For example, 3 zones will be imported in the image below)

Column A: Zone Name: Enter the name of the zone to be displayed (Customer name, supplier, etc.). Be careful not to use the same name for two zones. For example, instead of Tim Hortons, enter Tim Hortons Laval.
Column B: Full Address: The full address must be entered in column B. (street number, street name, city, province (state and postal code are not mandatory))
If the address is spread across multiple columns, the import will not work.

Column C: Reference: Enter an internal reference (not mandatory). The reference will only be displayed when exporting zones in Excel format.
Column D: Comments: Enter comments about the zone (not mandatory). Comments will be displayed on the map and visible in the zone list. AttriX tip: Include the contact name, an account number, phone number, opening hours, parking spaces, details about stops, for example.
Column E: Is the zone circular?: Not a required field. In the options, when importing, you will choose the shape. If you want to import both circular and square zones, then indicate Yes or No in column E.
Importing the File
From the main menu, select
- Productivity
- Zones
- Import Zones
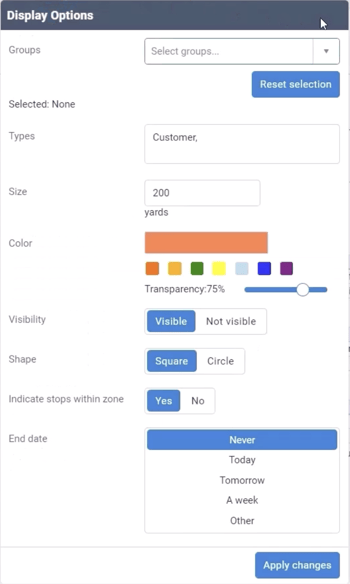
- Click on Options and configure the settings.
-
Press Apply Changes
-
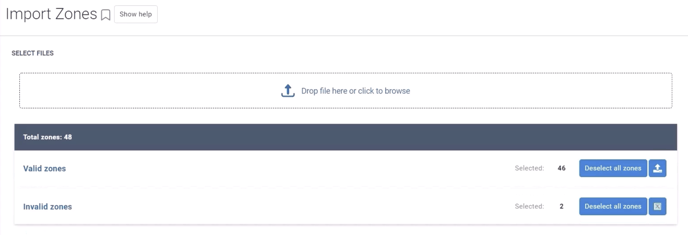
Select the Excel file to import and drop it into the designated box.

Validating Zone Import
- To import the valid zones, press the arrow on the right. Be careful not to double-click.
-
To view invalid zones, press on Invalid Zones.
Invalid Zones
It is possible to correct invalid zones directly in MyGeotab. Simply press
- Invalid Zones
- Select the boxes to correct
- Correct the data
-
Once the data is valid, it will be transferred to Valid Zones.