Asset Inspections (Safety Rounds): Declaring a Repair
How to indicate that a defect has been repaired?
An administrator or a person designated by the company must manage the asset inspections (Safety Rounds) in MyGeotab. To do this, the user must have security permissions allowing them to administer Safety Rounds logs.
Viewing Inspections
To access asset inspections: Maintenance Tab > Asset Inspections
In the Options menu, select the desired dates, vehicles, and trailers, and then press Apply Changes.
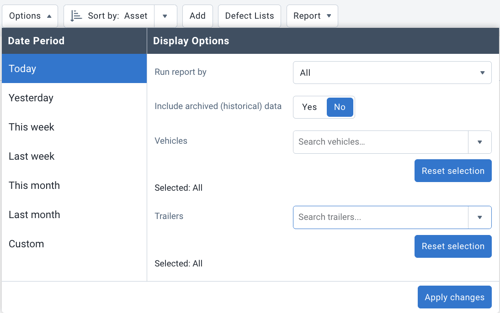
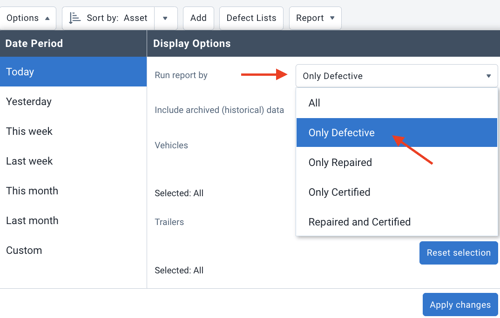
- It is possible to limit the display of inspections by executing the report with one of the following filters.
List of Inspections
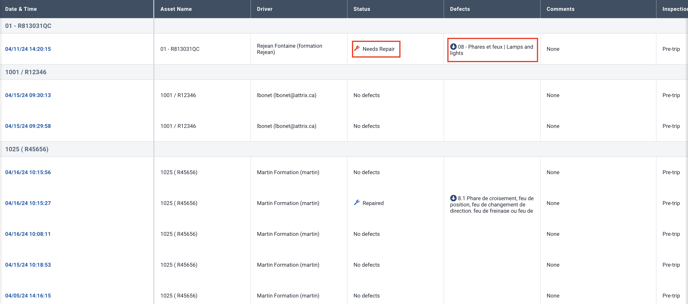
The list of completed inspections will be displayed.
In the Status column, a Safety Round with a defect that requires repair will be identified by a red tool-shaped icon.
A Safety Round with a defect that has been marked as repaired will be identified by a blue tool-shaped icon.
How to indicate that the repair has been made?
To declare a defect as repaired, select the date of the inspection that presents a defect from the list of inspections.
- Under the Defects section:
- Change the repair status to Repaired or No defect
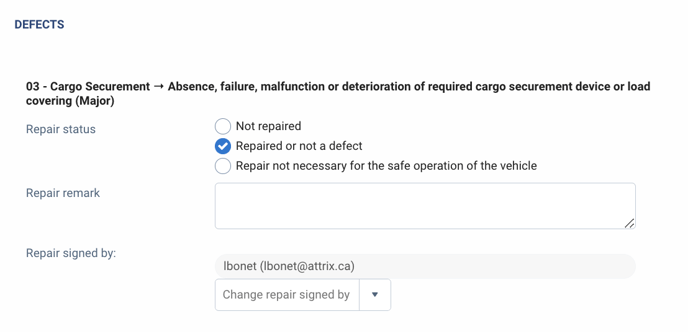
- Change the repair status to Repaired or No defect
- Under the Repair Notes section:
- Provide all relevant details related to the repair, such as a work order number, invoice number, garage name, etc.
- If the repair was performed by another user, it is possible to change the user in the Signed by section.
- Once the repairs are completed and the notes are added,
- press Save Complete at the top of the page.
- A new section will then be visible: Certification. According to your preference:
- The next driver will be able to certify the inspection as safe or
- Certify the inspection by selecting "safe."
- Press Certify and Save at the top of the page.
- Print the Safety Round (Press Download PDF) and file the inspection with the proof of repair in your vehicle or trailer file for compliance purposes.
The defect will then be indicated as repaired in MyGeotab as well as in Geotab Drive.
Declaring that the vehicle does not need repairs to be driven safely (minor defect only).
If applicable, under the defects section:
- Change the repair status to The vehicle does not need repairs to be driven safely.
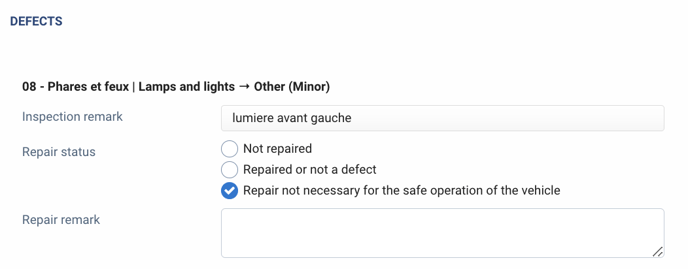
- Under the Remarks section:
- Write an annotation explaining why the repair was not made.
- For example, the defect was reported on June 6 at 07:10
- On June 7 at 08:00, the driver must redo an inspection, but the defect is still present.
- The repair must be made within 48 hours for a minor defect.
- Write an annotation explaining why the repair was not made.
- If the repair was performed by another user, it is possible to change the user in the Signed by section.
- Press Save Complete at the top of the page.
- A new section will then be visible: Certification. According to your preference:
- The next driver will be able to certify the inspection as safe or
- Certify the inspection by selecting "safe."
- Press Certify and Save at the top of the page.
- Print the Safety Round (Press Download PDF) and file the inspection with the proof of repair in your vehicle or trailer file for compliance purposes.
The defect will then be indicated as repaired in MyGeotab as well as in Geotab Drive.
Operator Responsibilities when a Defect is Reported
Reference: Safety Round Guide (SAAQ) p.16
When the operator receives a copy of a safety round report indicating a defect, they must:
- Sign the copy of the safety round report.
- Promptly inform the owner of the presence of a defect.
- Provide the owner with a copy of the safety round report.
Owner Responsibilities when a Defect is Reported
The owner must correct any defect that is reported to them.
- Minor Defect: The owner has 48 hours to make the necessary repairs to maintain the vehicle's right to operate.
- Major Defect: The vehicle loses its right to operate until the necessary repairs have been made.
PRINT THE REPORT
- In the inspection sheet that shows a defect (there is no need to print all safety rounds without defects)
- Press Download PDF and print.
- Sign the page to attest that you have reviewed it.
- Place the inspection sheet in the asset's file with the supporting repair documents.